Mastering Sanity Presentation: Live Visual Editing Across Separate Projects
In This Article
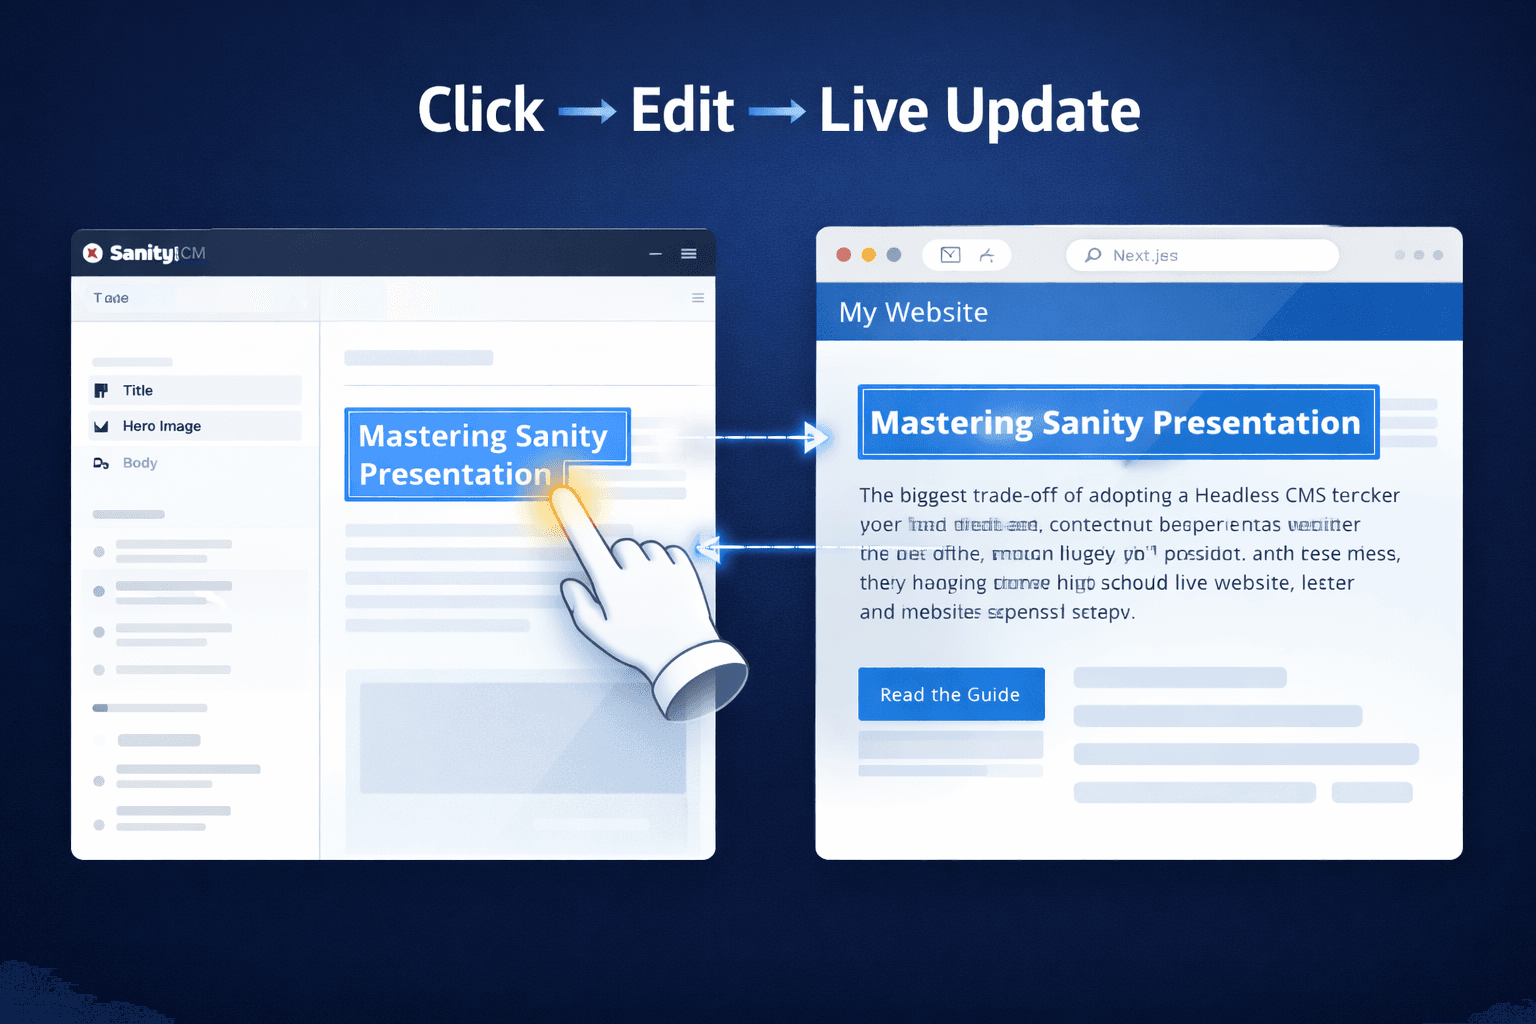
The biggest trade-off of adopting a Headless CMS has always been the loss of visual context. Content editors are forced to fill out abstract forms in a dashboard, hit "publish," and cross their fingers hoping it looks right on the live website.
Enter Sanity Presentation.
Introduced as a paradigm shift for headless architecture, the Presentation tool brings side-by-side, click-to-edit visual editing back to content teams. And the best part? Because it relies on cross-origin communication and "Stega" (content source maps), it works flawlessly even if your Sanity Studio and your frontend are completely separate projects.
In this guide, we are going to build this connection from Step 0, assuming you have a decoupled architecture with a Sanity Studio repository and a Next.js (App Router) frontend repository.
Step 0: The Prerequisites
Before we start wiring things together, ensure you have the following baseline:
- A Sanity Studio Project (v3+): Running locally (e.g., http://localhost:3333).
- A Next.js App Router Project: Running locally (e.g., http://localhost:3000).
- next-sanity installed: Make sure your frontend is already successfully fetching standard data from Sanity.
Step 1: Configuring the Sanity Studio
Accelerate Content Delivery & Improve Team Productivity
First, we need to install the Presentation tool in your Sanity Studio repository. This tool creates a specialized workspace in the Studio that loads your frontend application inside a secure iframe.
Install the package:
Bash
npm install @sanity/presentation
Next, open your sanity.config.ts file. We need to add the presentationTool to the plugins array and point it toward your frontend application.
// sanity.config.ts (Inside your Studio project)
import { defineConfig } from 'sanity'
import { deskTool } from 'sanity/desk'
import { presentationTool } from '@sanity/presentation'
import { schemaTypes } from './schemas'

export default defineConfig({
  name: 'default',
  title: 'My Enterprise Project',
  projectId: process.env.SANITY_STUDIO_PROJECT_ID!,
  dataset: process.env.SANITY_STUDIO_DATASET!,

  plugins: [
    deskTool(),
    presentationTool({
      // Point this to your frontend URL.
      // Use environment variables to switch between localhost and production.
      previewUrl: {
        origin: process.env.SANITY_STUDIO_FRONTEND_URL || 'http://localhost:3000',
        previewMode: {
          enable: '/api/draft', // We will build this route in Step 2
        },
      },
    }),
  ],

  schema: {
    types: schemaTypes,
  },
})
If you start your Studio now, you will see a new "Presentation" tab. However, clicking it will just show your live website. It isn't "interactive" yet. We need to prepare the frontend.
Step 2: Enabling Draft Mode on the Frontend
Switch over to your Next.js Frontend repository.
For visual editing to work, the Sanity Studio needs to see unpublished drafts. Next.js provides a feature called "Draft Mode" which bypasses the standard caching mechanisms. We need an API route that the Studio can hit to turn this mode on.
Create a new file at app/api/draft/route.ts:
// app/api/draft/route.ts (Inside your Next.js project)
import { draftMode } from 'next/headers'
import { redirect } from 'next/navigation'

export async function GET(request: Request) {
  const { searchParams } = new URL(request.url)
  const secret = searchParams.get('secret')
  const slug = searchParams.get('slug')

  // Security check: Ensure only authorized users (the Studio) can trigger draft mode
  if (secret !== process.env.SANITY_PREVIEW_SECRET) {
    return new Response('Invalid token', { status: 401 })
  }

  if (!slug) {
    return new Response('Missing slug', { status: 400 })
  }

  // Turn on Draft Mode
  draftMode().enable()

  // Redirect the iframe back to the requested page
  redirect(slug)
}
Note: You must set the SANITY_PREVIEW_SECRET in your .env file. You will also need to configure your Studio to pass this secret, but for local testing, the basic setup above will establish the connection.
Step 3: The Magic of "Stega" (Content Source Maps)
How does clicking a headline on your website tell the Sanity Studio which exact database field to open? The answer is Stega.
Stega is an invisible, zero-width string encoding technique. When the Sanity client fetches data in draft mode, it subtly encodes the document ID, path, and field name directly into the strings (e.g., your titles and paragraphs).
To enable this, update your Sanity client configuration in your frontend:
// lib/sanity.client.ts (Inside your Next.js project)
import { createClient } from 'next-sanity'

export const client = createClient({
  projectId: process.env.NEXT_PUBLIC_SANITY_PROJECT_ID,
  dataset: process.env.NEXT_PUBLIC_SANITY_DATASET,
  apiVersion: '2024-01-01',
  useCdn: false, // CDN should be false for draft mode
  stega: {
    enabled: true,
    // Tell the frontend where the Studio lives,
    // so it knows where to send the user when they click an element
    studioUrl: process.env.NEXT_PUBLIC_SANITY_STUDIO_URL || 'http://localhost:3333',
  },
})


Now, when you fetch data, you must tell the client whether or not Draft Mode is active:
TypeScript
import { draftMode } from 'next/headers'
import { client } from '@/lib/sanity.client'

export async function getPageData(slug: string) {
  const isDraftMode = draftMode().isEnabled

  return client.fetch(
    `*[_type == "page" && slug.current == $slug][0]`,
    { slug },
    {
      // If draft mode is on, use the 'previewDrafts' perspective
      perspective: isDraftMode ? 'previewDrafts' : 'published',
      stega: isDraftMode,
    }
  )
}
Step 4: Adding the Visual Editing Overlay
The final piece of the puzzle is a listener component. When Draft Mode is active, we need a script running on the frontend that listens for the user clicking on those invisible Stega strings, and communicates that click back to the Studio iframe via postMessage.
Fortunately, next-sanity provides this out of the box. Add it to your root layout.tsx:
// app/layout.tsx (Inside your Next.js project)
import { draftMode } from 'next/headers'
import { VisualEditing } from 'next-sanity'

export default function RootLayout({
  children,
}: {
  children: React.ReactNode
}) {
  return (
    <html lang="en">
      <body>
        {children}

        {/* If the user is in Draft Mode, inject the Visual Editing scripts */}
        {draftMode().isEnabled && <VisualEditing />}
      </body>
    </html>
  )
}
Step 5: CORS Configuration (Crucial for Separate Projects)
Because your Studio (localhost:3333) and your Frontend (localhost:3000) live on different ports (and eventually, entirely different domains in production), you will run into Cross-Origin Resource Sharing (CORS) errors.
You must explicitly whitelist your frontend URL in your Sanity project settings:
- Go to manage.sanity.io.
- Select your project and navigate to the API tab.
- Under CORS Origins, add your frontend URLs (e.g., http://localhost:3000 and https://your-production-site.com).
- Ensure you check the box to Allow Credentials for these origins so authentication passes through the iframe correctly.
The Result
Boot up both your Studio and your Next.js application.
When you navigate to the "Presentation" tab in the Studio, you will see your Next.js site load. Because you are accessing it through the Presentation tool, it hits your /api/draft route, enabling Draft Mode and Stega encoding.
As you hover over the text on your website, a blue outline will appear. Click the text, and the left-hand Sanity form will instantly scroll to and highlight the exact field you need to edit. You have successfully bridged the gap between a decoupled frontend and a headless CMS!